Bit of a blast from the past here! I wanted a Sanguinary Priest with Jump Pack so picked up one of the metal old hammer lads and painted him up! His face is a bit 'bottox' but a quality model to work on.
Following Raldoron I worked on this unit of Blood Angels. They're a Forgeworld HH unit so a little bit special! Quite fun to work on- although flying bases are a PITA!
Now my Sylvaneth force is 'finished' (for now) and my trip to Warhammer World is done, its time to turn my attention to preparing for Nerd Day 2018. Part of this preparation is to paint up 1000 points of Nurgle Daemons... and, obviously, I need a colour scheme to do that!
Whilst searching for inspiration on Youtube, I found the rather awesome video below.
Using the colours, techniques and process covered in this video I distilled my own process (described below) which I plan to use... and will test our on a unit of Plaguebearers in the coming days.
For now, here's the process:
STAGE 1 - BASE COLOURS
Skin Basecoats
Loren Forest - all over airbrush
Zamesi Desert - 45% zenithal
Nurgling Green - 90% zenithal
Nurglings2
Basecoat
Rakarth Flesh
Pallid Wych Flesh
Shade
Druchii Violet/Drakenhoff Nightshade
Wounds/Boils/Inside Mouth Basecoats
Bestigor Flesh - airbrush
Ungor Flesh - airbrush/brush as needed
Steel/Silver Metallics
Basecoats
Black
Leadbelcher - drybrush
Gold/Bronze Metallics
Basecoats
Warplock Bronze
Brass Scorpion
Horns/Claws/Toe Nails
Black - from the top down to green skin colour already applied
Heads and other Trophies of dead Flesh
Basecoats
Ogryn Camo
Rakarth Flesh/Slaanesh Grey
Shade
Druchii Violet/Drakenhoff Nightshade - random washes of the two colours on the skin
Cloth
Basecoat
White Scar or other appropriate base colour (e.g. Khorne Red)
Weather
Brown pigment - into areas of shade
Rust pigments - patchy all over
Black/Dark brown pigments - into recesses
Wipe off from highlight areas with a cotton wool bud
Seal with pigment fixer.
STAGE 2 - SHADING
Vallejo gloss varnish
all over shade with Dark ToneStrong Tone/wash mixing medium *do not wash any cloth* - instead, matte down the cloth with Army Painter wash mixing medium
randomly apply wash mix to areas of the base to matte them down
STAGE 3 - DETAILS AND EFFECTS
Skin Highlights
Nurgling Green - drybrush
Nurgling Green/White Scar 50/50 mix - drybrush
Targeted wash
Athonian Camodshde - into recesses
Athonian Camoshade/Nuln Oil 50/50 - wash into recesses already painted with Athonian Camoshade
Druchi Violet/Drakenhoff Nightshade - wash randomly around the model in the creases
Wounds/Boils/Inside Mouth Shade/effects
Reikland Fleshade - generous into boils/wounds!
Baneblade Brown/White Scar 50/50 mix - apply to teeth
Chaos Black/Evil Sun Scarlet - diluted so like a wash. apply to the lower areas of the founds/boils and drag down (leakage!). Also, apply in mouth
Blood for the Blood God (slightly diluted with water) into lower parts of the wounds/boils. Also, apply to the mouth.
Nurgle's Rot - applied around boils/wounds like above step
Eyes
Nurgle's Rot
Ungor Flesh
Heads and other Trophies of dead Flesh
Highlight
Slaanesh Grey
Ulthuan Grey
Dark Reaper - highlight any hair on dead heads.
Steel/Silver Metallics
Shade/effects
Rhinox Hide/Black - sponge over metallic areas
Agrax Earthshade Gloss - applied only to any mechanical parts (to simulate oily parts)
Typhus Corrosion/Ryza Rust - in patches (to simulate rust)
Stormhost Silver - drybrush (edge highlight for character models)
Gold/Bronze Metallics Shade/effects
Rhinox Hide/Black - sponge over
Agrax Earthshade Gloss - applied to any mechanical parts to simulate oily parts
Stormhost Silver - drybrush
Nihilakh Oxide - slightly diluted applied to some recesses (less is more!)
Horns/Claws/Toe Nails
Gloss varnish - towards the top of the horns
STAGE 4 - BASE
In terms of the base, I'll be going with something like the below. Black/brown colours and some rusty weathering powders along with some black glossy areas.
Base colours
Mechanicus Standard Grey - airbrushed over the whole base
Dryad Bark - airbrushed around the outer edge of the base
Abaddon Black - Airbrushed around the rim and at various spots on the base to create a shadow.
Soot/Dark Brown pigment heavily diluted and applied to the base
Weathering Powder/Effects
Rust pigment weathering powder - selectively dabbed on to the base.
Seal pigments with Isopropanol alcohol
'Ardcoat - selectively applied to areas of the base
So recently there was a live stream on the Warhammer Live Twitch stream called 'Painting Hang Out with Peachy and Duncan'. It was awesome! Really good entertainment and a pleasure to watch.
My hobby progress has been slow over the last month and whilst I've made progress on a variety of models; Blood Angel Tactical Marines, Slyvaneth Kurnoth Hunters, Tree Revenants and 2 Branchwraiths... I haven't finished any or managed to take any recent WIP photos.
This post, however, is mainly to cover a couple of social painting evenings I've hosted recently in preparation for Nerd Day 2018. The goal is to help a couple of friends who haven't painted models for many years to paint up a selection of their models which can then be used during nerd weekend 2018.
For individuals on the fringe of the hobby I believe the notion of painting models can be quite intimidating... not only do you need to understand the techniques involved, there is also an associated cost (paints, brushes etc.) which can easily become a barrier of entry. Hosting events where I can remove those barriers has been very rewarding and, as you can see below, seems to be nurturing some potential talent!
First I'll cover the hobby area! I set up two stations for my budding hobbyists, complete with citadel paint system chart for easy reference.
The only requirement I placed on my two protégé was to supply their own models. Neither let the side down! Dan, arrived armed with some goodies from his childhood! An old skool, 1994, Citadel Paint Set... which had usable paint!! very cool indeed!
Dans also brought along a complete Warhammer (4th? edition) boxed set. It's from this set that Dan chose which models to paint.
Alongside Dans Fantasy Battle models, Barry rocked up with an extended Skaven 3rd Edition Blood Bowl team!
These in progress pictures were taken following the second evening. As you can see, good progress has been made by both hobbyists!
Here are the archers Dan has base coated. I've been very impressed by the state of all the models and can't wait to see further progress in the new year.
Throughout 2017, whilst I've been working on scenery for BathCon 2017, I've spent a lot of time experimenting with various painting techniques trying to find methods of painting which fit with my hobby goals, style and ability. In short, the goal has been to find a technique which takes advantage of an airbrush, is quick to apply and which yields good results. I'm pleased to write that I think I've found the right combination of techniques to achieve my goal! This post covers how I've got to this monumental moment :)
Airbrush
So, I've had my airbrush for nearly 4 years. 2017 is the year I finally got to grips with it as a tool. In the past, I always found that the cleaning and maintenance put too much of an overhead on the benefits I reaped from its use. Enter stage left a glass full of water! This very simple addition to my Airbrush regime has made all the difference! Whenever I finish using my airbrush I wash it out in the sink and then simply place it in the cup of water... sometimes for weeks in between use. This ensures that there is never any dried paint to clean out before use and allows for much quicker applications of paint when required.
As a benefit of this, I also cracked the method for preparing paints for use with the Airbrush. You need thin paints! Almost all of my paints are GW. I like the clearly defined painting system they employ in regards to base coats and their matching layer paints. The downside of this is that I need to water down the paints before use in the airbrush. I've found that a suitable mix of paint, water and Vallejo Airbrush Flow Improver make it very easy to dilute the paint enough to work through the airbrush without any problem.
Shading
Now on to the big one! Shading has been the area of the process which has involved most experimentation, failure and therefore required most thought to nail.
Shading is a very important step in painting a miniature and I have been on a mission to find a suitable method of applying a wash which is quick, gives awesome results and most importantly doesn't result in a need to reapply base paints to tidy up the shade. Not only is such an action a waste of time it is also very challenging to adequately reapply base paints when they have been airbrushed and so are likely part of a transition. I realise that applying a targeted ‘pin’ wash would solve this but that option would take too much time so wasn’t an option.
Initially, I attempted to follow the method recommended by the top dawg, Kenny Boucher, of Next Level Painting. Kenny’s recommended method involved coating the model in gloss varnish and then using a gloss Nuln Oil or Agrax Earthshade wash. The combination of the gloss varnish and gloss shade ensure that the surface tension of the wash is maintained and drastically reduced any ‘coffee staining’ which can occur. I initially found this method to give positive results: I used in on a Blood Angels Tactical Squad early on in the year, however, some coffee staining did occur. Later, when using this method I encountered some issues when the wash seemingly dissolved the gloss varnish coat. This had some very problematic results for the Shadow War: Armageddon terrain I posted about back in June. It's worth noting though that I don’t think this was due to the wash/technique… more I’d either applied the gloss varnish to thinly or that I hadn’t left it long enough to dry (or both!).
As I appear to be covering this in chronological order, next up, during the summer I was listening to an episode of the fantastic Sons of Heresy podcast and the hosts mentioned following a shading technique they learnt during a seminar at a Horus Heresy event. After a quick YouTube search, a video of a chap called Mark Bedford who works at ForgeWorld revealed not only the secrets of how to apply a great wash but also how to follow a quick painting process to get your models on the board. I’ve included it below as it’s a fantastic video and well worth a watch, but the section which stood out for me revolved around his wash mixture… and how he applies the wash as the last stage of painting a miniature.
Andy’s wash mixture stood out as it seemed to promise the answer to the coffee staining problem. Essentially one mixes 1 part Nuln Oil, 1 part Seraphin Sepia, 1 part Lahmain Medium and 3 parts water to produce a subtle wash mixture; applied after a coat of gloss varnish. I tried this mix on 3 of the GW Objective Markers which were released along with 8th Edition. The washes worked fantastically aside from white residue which appeared in the areas where the wash had pooled the most. Upon investigation, it appears that this is due to the water element of the wash. Diluting GW washes with water is a huge no-no!
Base - Highlight - Shade
Following on from unlocking the ultimate shade formula I'd like to cover the idea of base coating, then highlighting and finally shading. This is, of course, different from the GW painting system of Base - Shade - Highlight! I feel that if one chooses to use an airbrush as the primary method to apply base coats and use gradual transitions for highlight (and also some shadows), following the traditional process causes issues as maintaining the transitions is difficult. Alternatively, if one can apply the highlight before shading the model... and the shade doesn't cause any coffee staining, that's ideal!
The trick is to highlight the model to '11' in preparation for the colour muting down. Whilst painting many of the large GW bits of scenery I've worked on, namely the Sector Mechanicum (Shadow War: Armageddon terrain), I noticed how the final colour of the terrain was always coming out darker than I desired. There were two reasons for this, 1) that the airbrush layers became less vibrant when dry and 2) as already indicated, the wash when applied also reduced the vibrancy of the colour. On some of the later pieces of scenery, I got used to highlighting the model to '11' in preparation for the toning back of the colours and found that it works perfectly! The bonus is that applying the shade last means your models look suitably muted and 'realistic' (as opposed to a cartoony look).
Pulling it all together
When painting my most recent model, Sly Marbo, I took the opportunity to bring together all the lessons learnt (mentioned above!). The shade was mixed up using 1 part Nuln Oil, 1 part Seraphin Sepia and 4 parts Lahmain Medium (essentially replacing the water element from Andy Bedford's mix with an increased amount of Lahmain Medium. Happily, it worked a treat and in conjunction with all my learning, he looks great!
In conclusion, I feel like my understanding of painting has increased a lot this year. My abilities with a paint brush (or airbrush) may not be top drawer but what skill I do have, combined with the techniques I’ve mentioned in this post, should mean I’m able to increase my output and for the models to be of a higher quality than I was previously achieving.
The learning never stops though... Next up I will be focusing on my Sylvaneth force. These models will provide a fantastic opportunity to refine the process on some amazing, organic miniatures. I’ve also ordered some Army Painter shades and shade medium as I’ve heard great things about their shades. I will use these to mix a wash along the lines as that mentioned above.
Hot on the heels of BathCon 2017, I've been working on Sly Marbo.
This is an old GW model which I wanted to add to my collection due to his rules as a 'one man army' in Shadow War: Armageddon. I picked him, minus 1 arm and thickly coated in a rather terrible paint job from eBay for about£5! The arm was replaced with one from the Catachan set (again, an eBay purchase). My friend Dan used him (whilst still unpainted) with spectacular results during BathCon 2017. I will be starting to work on my Sylvaneth and Blood Angels models in preparation for a trip to Warhammer World in April 2018 but I wanted to get this guy painted up before starting those larger projects.
For this model, I used tested out a new process- this involved painting his base coat and highlights before shading. I really enjoyed this process; it was quick and will certainly be the process I now follow for all future models.
I base coated him with Bugmans Glow for the skin, Death World Forest for his vest, Caliban Green for his trousers and Dryad Bark for the pouches. Alongside those main colours, I painted the base with a mix of Mechanicus Standard Grey/Dryad Bark and Screaming Skull for the copper pipes.
As this guy is a 'one man army' in the context of how I will use him, I wanted to add a more detailed base. The base used here was taken from the Warhammer 40K basing kit which was glued to the top of a 25mm base.
Each colour was then highlighted using the recommended colours from the Citadel Painting System chart. Once complete the whole model was coated in gloss varnish in preparation for the wash.
The final steps involved shading the model using a mix of Nuln Oil/Reikland Fleshshade/Lahmain Medium. After that was dry I added Nihilakh Oxide/Nurgle's Rot to the pipes and a wash of Beil-Tan green to the lower half of the knife. Finally, a couple of thin coats of matte varnish were airbrushed on to the model to matte down and protect the miniature.
In conclusion, I am very happy with how he has come out. The new process, combined with the use of more delicate washes (diluted with Lahmain Medium) has allowed me to quickly paint this model to a good standard. As is always the case, I try and take learning forward... onwards to Tree Folk and the Sons of Sanguinius!
Quick post covering what I've progressed whilst working away.
Being away from home sucks for many reasons. In terms of hobby progress through, it has meant that my progress has been stopped in its tracks as I only have a few hours each Sunday to get my 'hobby on'.
A couple of weeks ago I picked up the Start Collecting Sylvaneth box with a view of providing the opportunity for away from home hobby progress. I'm happy to say that its been a success! On my first week away I built 16 Dryads and last week I base coated and shaded the armour on some Stormcast Eternals.
Whilst I'm at the mercy of varying hotel rooms and specifically the quality of lighting; I think I have enough models to facilitate hobby progress whilst away from home... and that's the goal :)
Whilst on annual leave a couple of weeks back my wife and I dropped in to Warhammer World. This was my 4th visit and my wife's first. I haven't visited since GW re-modeled the entrance and exhibition areas; so was very excited to see how it had changed.
The visit was also a week before my birthday and so my wife was armed with her credit card. At one point I had to refuse her offer to buy me the exclusive Warhammer World Space Marine tank bundle. Yep, she's a keeper! Whilst on the face of it, refusing such an offer would be bonkers, I can't complain about the haul I did leave Warhammer World with (and its nice to leave something for me to pick up next time I visit!):
Since reading the initial Horus Heresy novels last year I have been captivated by Loken and Abaddon. Therefor when I had the chance to pick up whichever HH Character Series I desired, since there is no Sanguinius (yet), it was an easy choice!
The next item on my shopping list, and a book I've wanted to pick up ever since I bought Volume One in the series, was the Imperial Armour Model Masterclass Volume Two. I haven't had the chance to analyse the techniques included in this volume in any detail yet but I'm looking forward to testing out the techniques and following that, during future projects.
Finally, I picked up two of the exclusive Warhammer World miniatures. As I seem to have 'accidentally' started a Stormcast Eternals army (I have the Storm of Sigmar starter set), I figured the Errant-Questor would be a good purchase. Alongside him, I've always wanted a Josef Bugman model... so he ended up in the basket as well!
Overall it was a fantastic day out. I took lots of photos, bought some cool swag and drank some nice ales at the home of GW. This post is the first in a small series of 5. The following 4 posts will cover photos from the Exhibition Centre- which is bloomin' epic!
Todays post centres on my final Blood Angels test mode which I've been working on this week. My goal was to reach a point where I had tested and documented the main steps in the process I will follow to paint my Blood Angels.
The process steps are detailed below:
Undercoat
Airbrush Vallejo black.
Airbrush Vallejo grey (zenithal highlight)
Basecoat
Airbrush GW Air Mephiston Red
Airbrush GW Air Evil Sunz Scarlet (zenithal highlight)
Paint details with GW/Vallejo base paints
Paint base with GW Steel Legion Drab.
Paint lighter areas of base with mix of GW Steel Legion Drab + GW Skull White
Pick out individual details on base with base colours
Apply gloss varnish
Apply decals
Seal decals
Shade
Apply brown/black oil wash to model and base
Tidy up shade with white spirit
Apply washes of thinned GW Steel Legion Drab mixed with earth coloured weathering powders to recesses on the base and lower areas of the model
Highlights
Highlight details on the model
Dry brush base with various earth coloured paints e.g. GW Tallarn Sand
Tidy up base
Seal
Vallejo Satin varnish
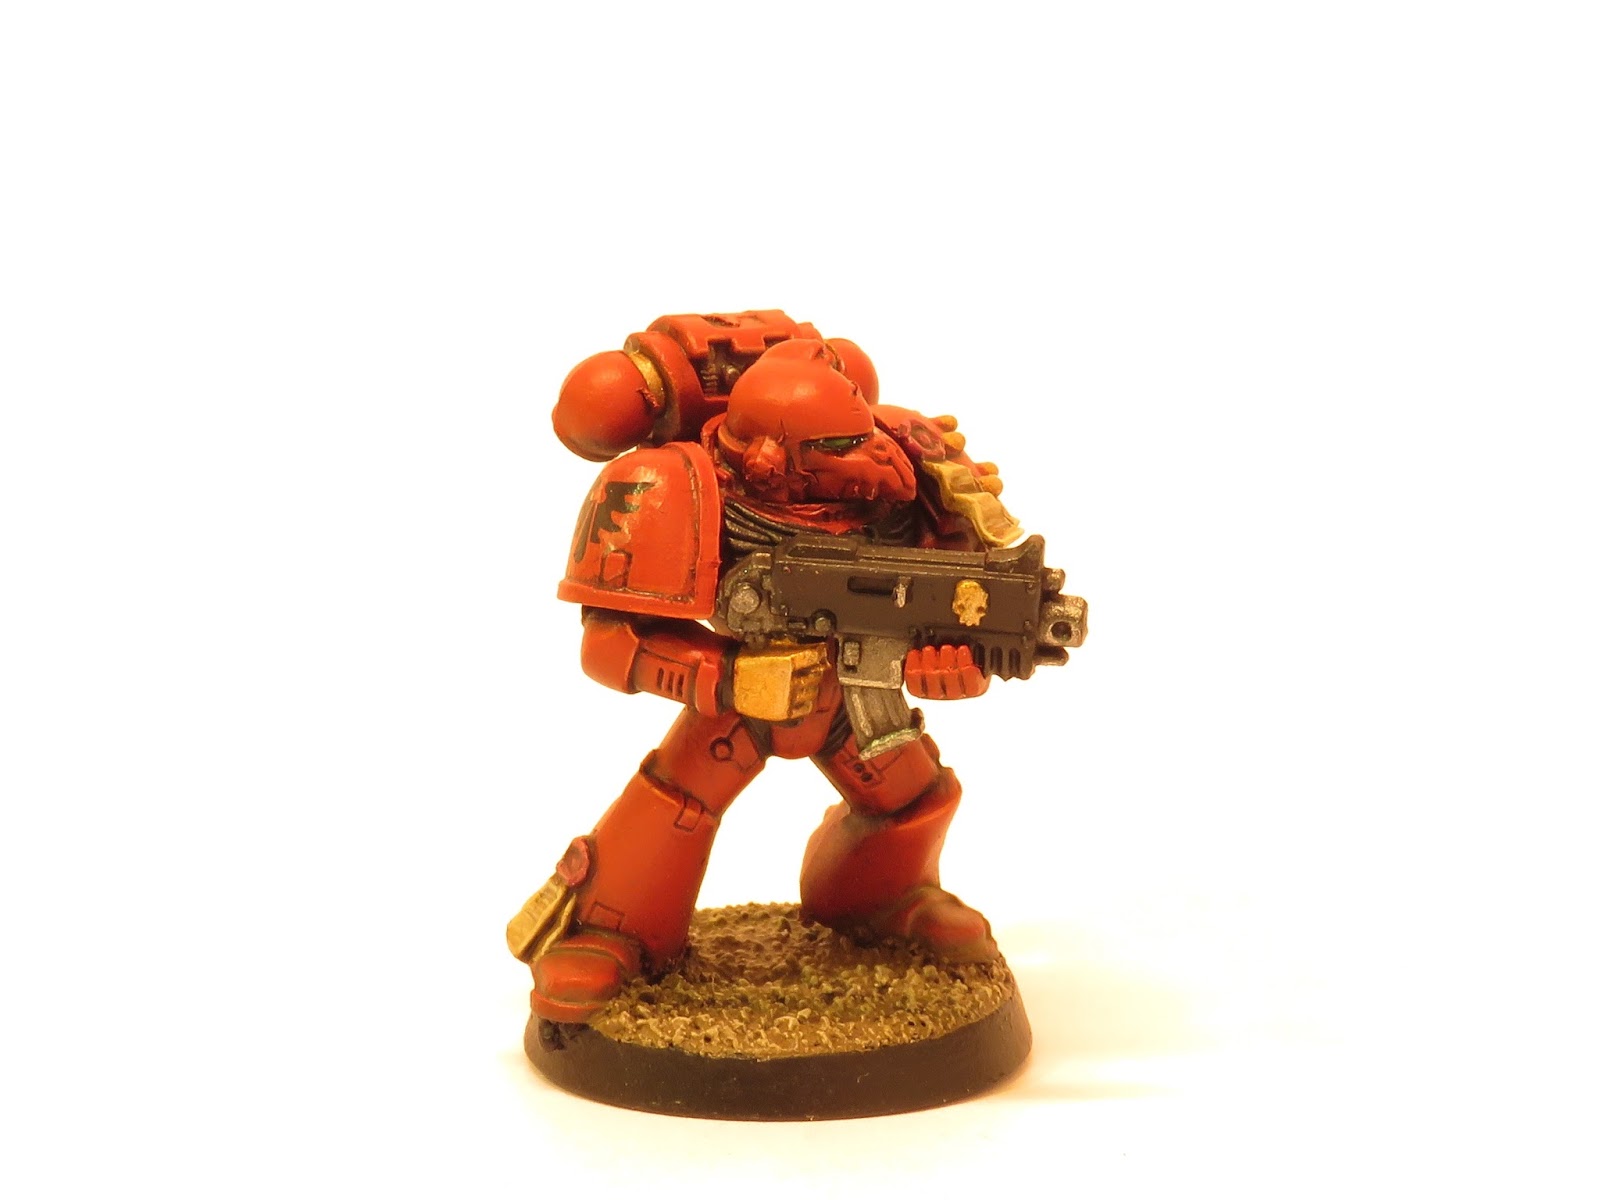
This process has been formulated from techniques observed on Youtube and from within the ForgeWorld Modelling Masterclass Volume 1 book. The scheme has been designed to combine elements of the Blood Angels livery from both 30K and 40K- hence the gold hand and other areas. Whilst the quality of the model isn't the highest (which wasn't part of my objectives), I feel as though I have sufficiently tested and learned enough about the scheme to move forward with starting on my army. The only tweak I will make is around the base. I didn't water down the GW Steel Legion Drab enough and so the base isn't to the quality I am trying to achieve (I want to get as close to the base on my Contemptor Dreadnought as possible- as it looks awesome!).
Next up I will be starting to work on my Blood Angels units... at last!
After my experimenting with Blood Angels test model, this week I have mostly been experimenting with bases! The bases photo'd in this post all use GW texture/dry paint combinations and basing stones.
I haven't completely settled on which colour I will go with for my Blood Angels although I'm leaning towards the 'urban' Astrogranite/Longbeard Grey combination. I'm also not entirely certain whether I will use the texture paints as I found them quite hard to apply. no matter that decision, it has been very useful to built this suite of test bases. No matter which style I choose for the BAs, I will retain these testers for any future projects.
Last night I spent some time working on further Blood Angels test models. Following my post earlier this week, I wanted to spent some time experimenting with a technique which would be quicker to paint and could result in a higher standard of paint job! a.k.a. a win/win!
So, these three, roughly, follow the same base coating/washing process (with some slight differences on each model, which I cover below):
I've noticed that a lot of hobbyists choose to add weathering effects to their models. This is something I've never really done- my first steps being to experiment on my recently completed Rhino, Predator and Thunderfire Cannon. I do however want to delve deeper into this area as I think it can be one of those finish touches (alongside decals) which really pull an army together.
Whislt researching how to add weathering effects I discovered that there are many techniques out there! some which involve very complicated processes (for example using hair spray on your models)... which to be honest I cant be arsed with, so the below technique looks like the way I'm going to go.
If anyone has any feedback, thoughts or tips on weathering please leave a comment.